
We began framing the home on June 2, 2015 as the project site for our 2015 Women Build. This is a one or two week build project we’ve done every year since 2009 where we invite women from the community to come out and volunteer on a Habitat job site. It is our goal to encourage women to join the Habitat movement and dispel the myth that our construction sites are a “men’s only” zone, which is far from true. We were lucky to have had 15-25 people on site for two four-day weeks, well over half of them being women. The volunteers did an amazing job, and by the end of the second week had the roof trusses on, the walls pretty much enclosed, and were beginning to lay down the roof decking.
On this home we chose to use an unconventional framing style on the walls, where we used 2×6 top and bottom plates and 2×4 studs, with the studs in a staggered pattern. The result is that nowhere in the home (except at windows and doors) do the studs run from the inside of the wall to the outside. Since wood is not a very good insulator, this “thermal break” in the framing drastically reduces heat loss through the walls, saving energy. You can see the staggered pattern of the studs in the photo below:
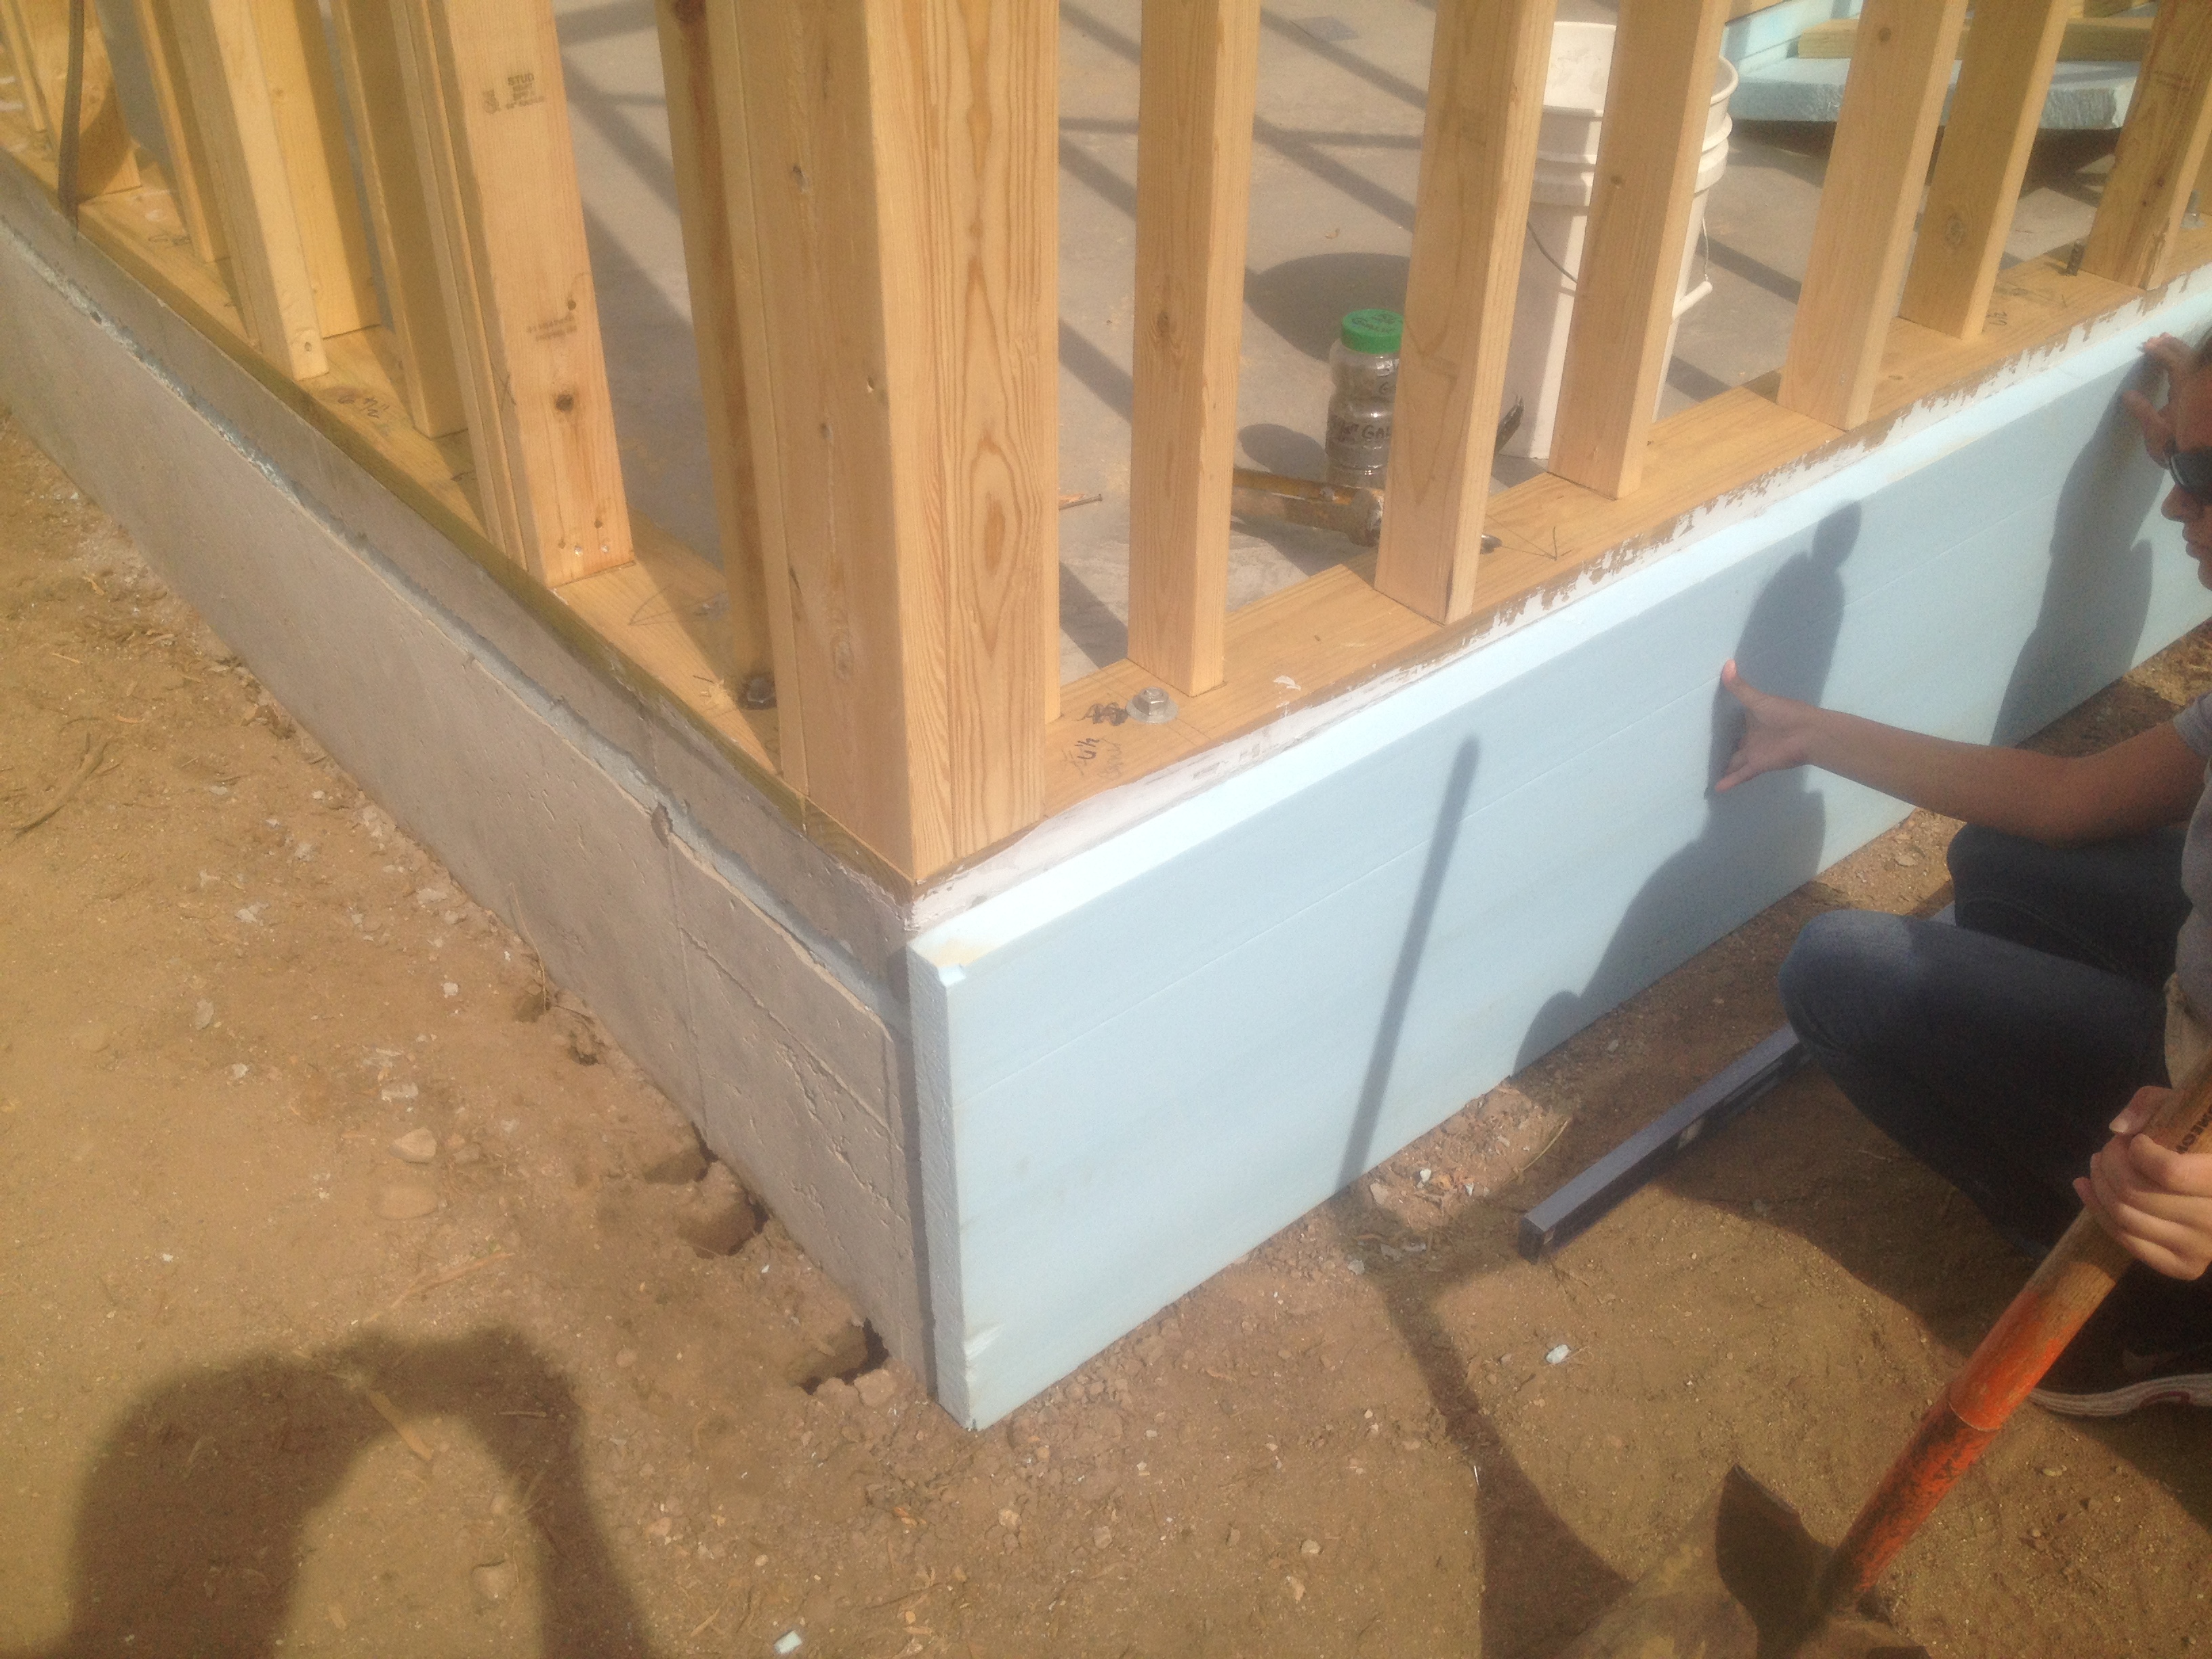
 We also used a framing method that allows wall insulation to carry all the way around the outside corners of the home’s framing. Since the corners of a home are typically a major area of heat loss, by again providing a thermal break, we cut down significantly on the amount of heat leaving the home. We will use metal clips to install the drywall in the corner instead of a wood stud. The photo below shows the corner framing:
 The exterior walls were also built using what are called “advanced” framing methods. This means that any lumber that is not essential for the structure of the home is simply not used. Since fiberglass or cellulose insulation is far better at preventing heat loss through the wall than wood, anywhere you can remove wood and replace it with insulation will save energy. The average home may have 25-30% of the wall space as framing, whereas our will only have 10-15%, allowing for much more insulation in the walls. Another benefit of advanced framing methods is that the amount of wood used to build the home is reduced, conserving natural resources and reducing cost. Here are the advanced framing techniques we used in the framing of these walls and photos below each:
1. Single top plates instead of double that are typically used. By aligning the roof trusses directly over each stud, a double top plate is not necessary for structural strength.

2. Studs placed on 24 inch centers instead of the usual 16 inches.
(notice the light blue line between the concrete floor slab and the foundation wall in this photo. This is the layer of foam that isolates the floor from the ground)

3. Staggered-stud framing, using 2×6 plates and 2×4 studs. In this case somewhat more lumber is used than a standard 2×6 wall, but the energy saving benefits are well worth the small additional cost. And since 2×6’s are more expensive than 2×4’s, the added cost isn’t really all that much.
(Notice in this shot the foam being applied to the outside of the concrete foundation wall and slab to hold in heat for the shallow footing system.)
4. No wood headers above non-load bearing windows and doors. If there is no weight above the opening, why put a large piece of lumber there to support it?

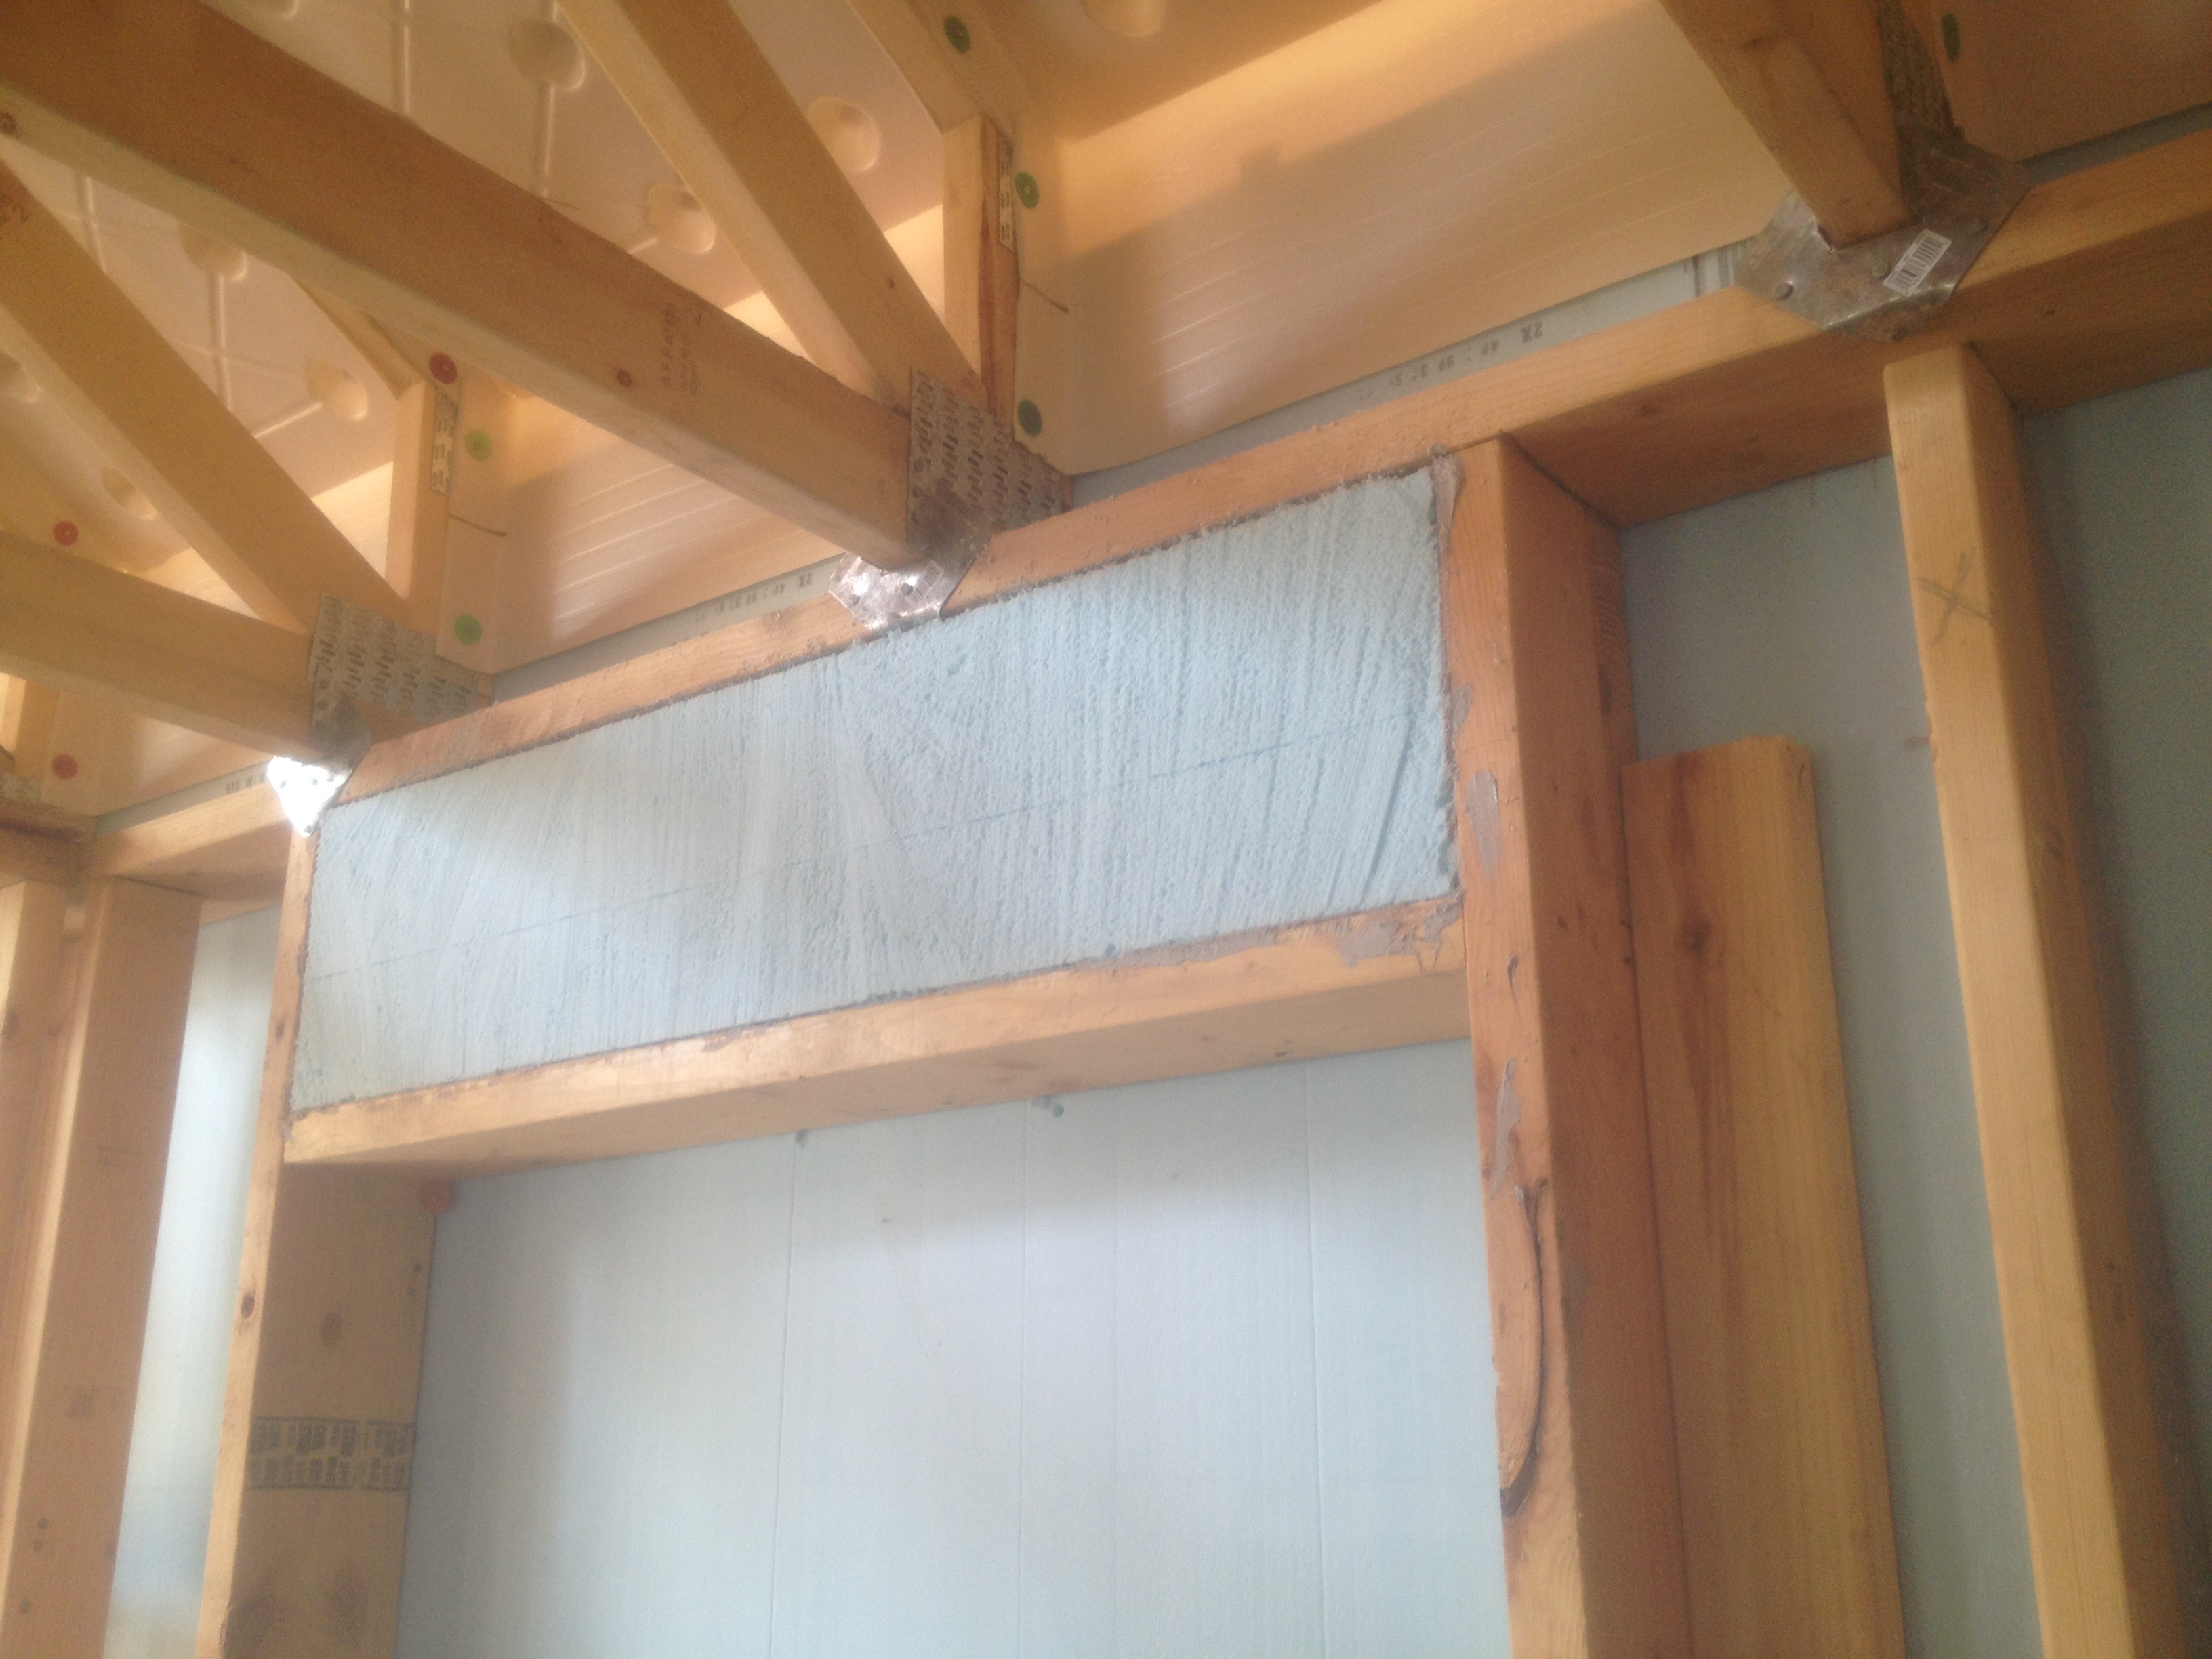
5. Where wood headers are required for support, we used single headers instead of double or triple that are often used. They still meet or surpass code for support. The typical window header has an R-value (insulation value) of about R-6. With the insulation we can add by reducing unnecessary lumber, ours will be R-22. You can see in the second photo where we installed layers of Dow foam into the void behind the wood header for insulation.

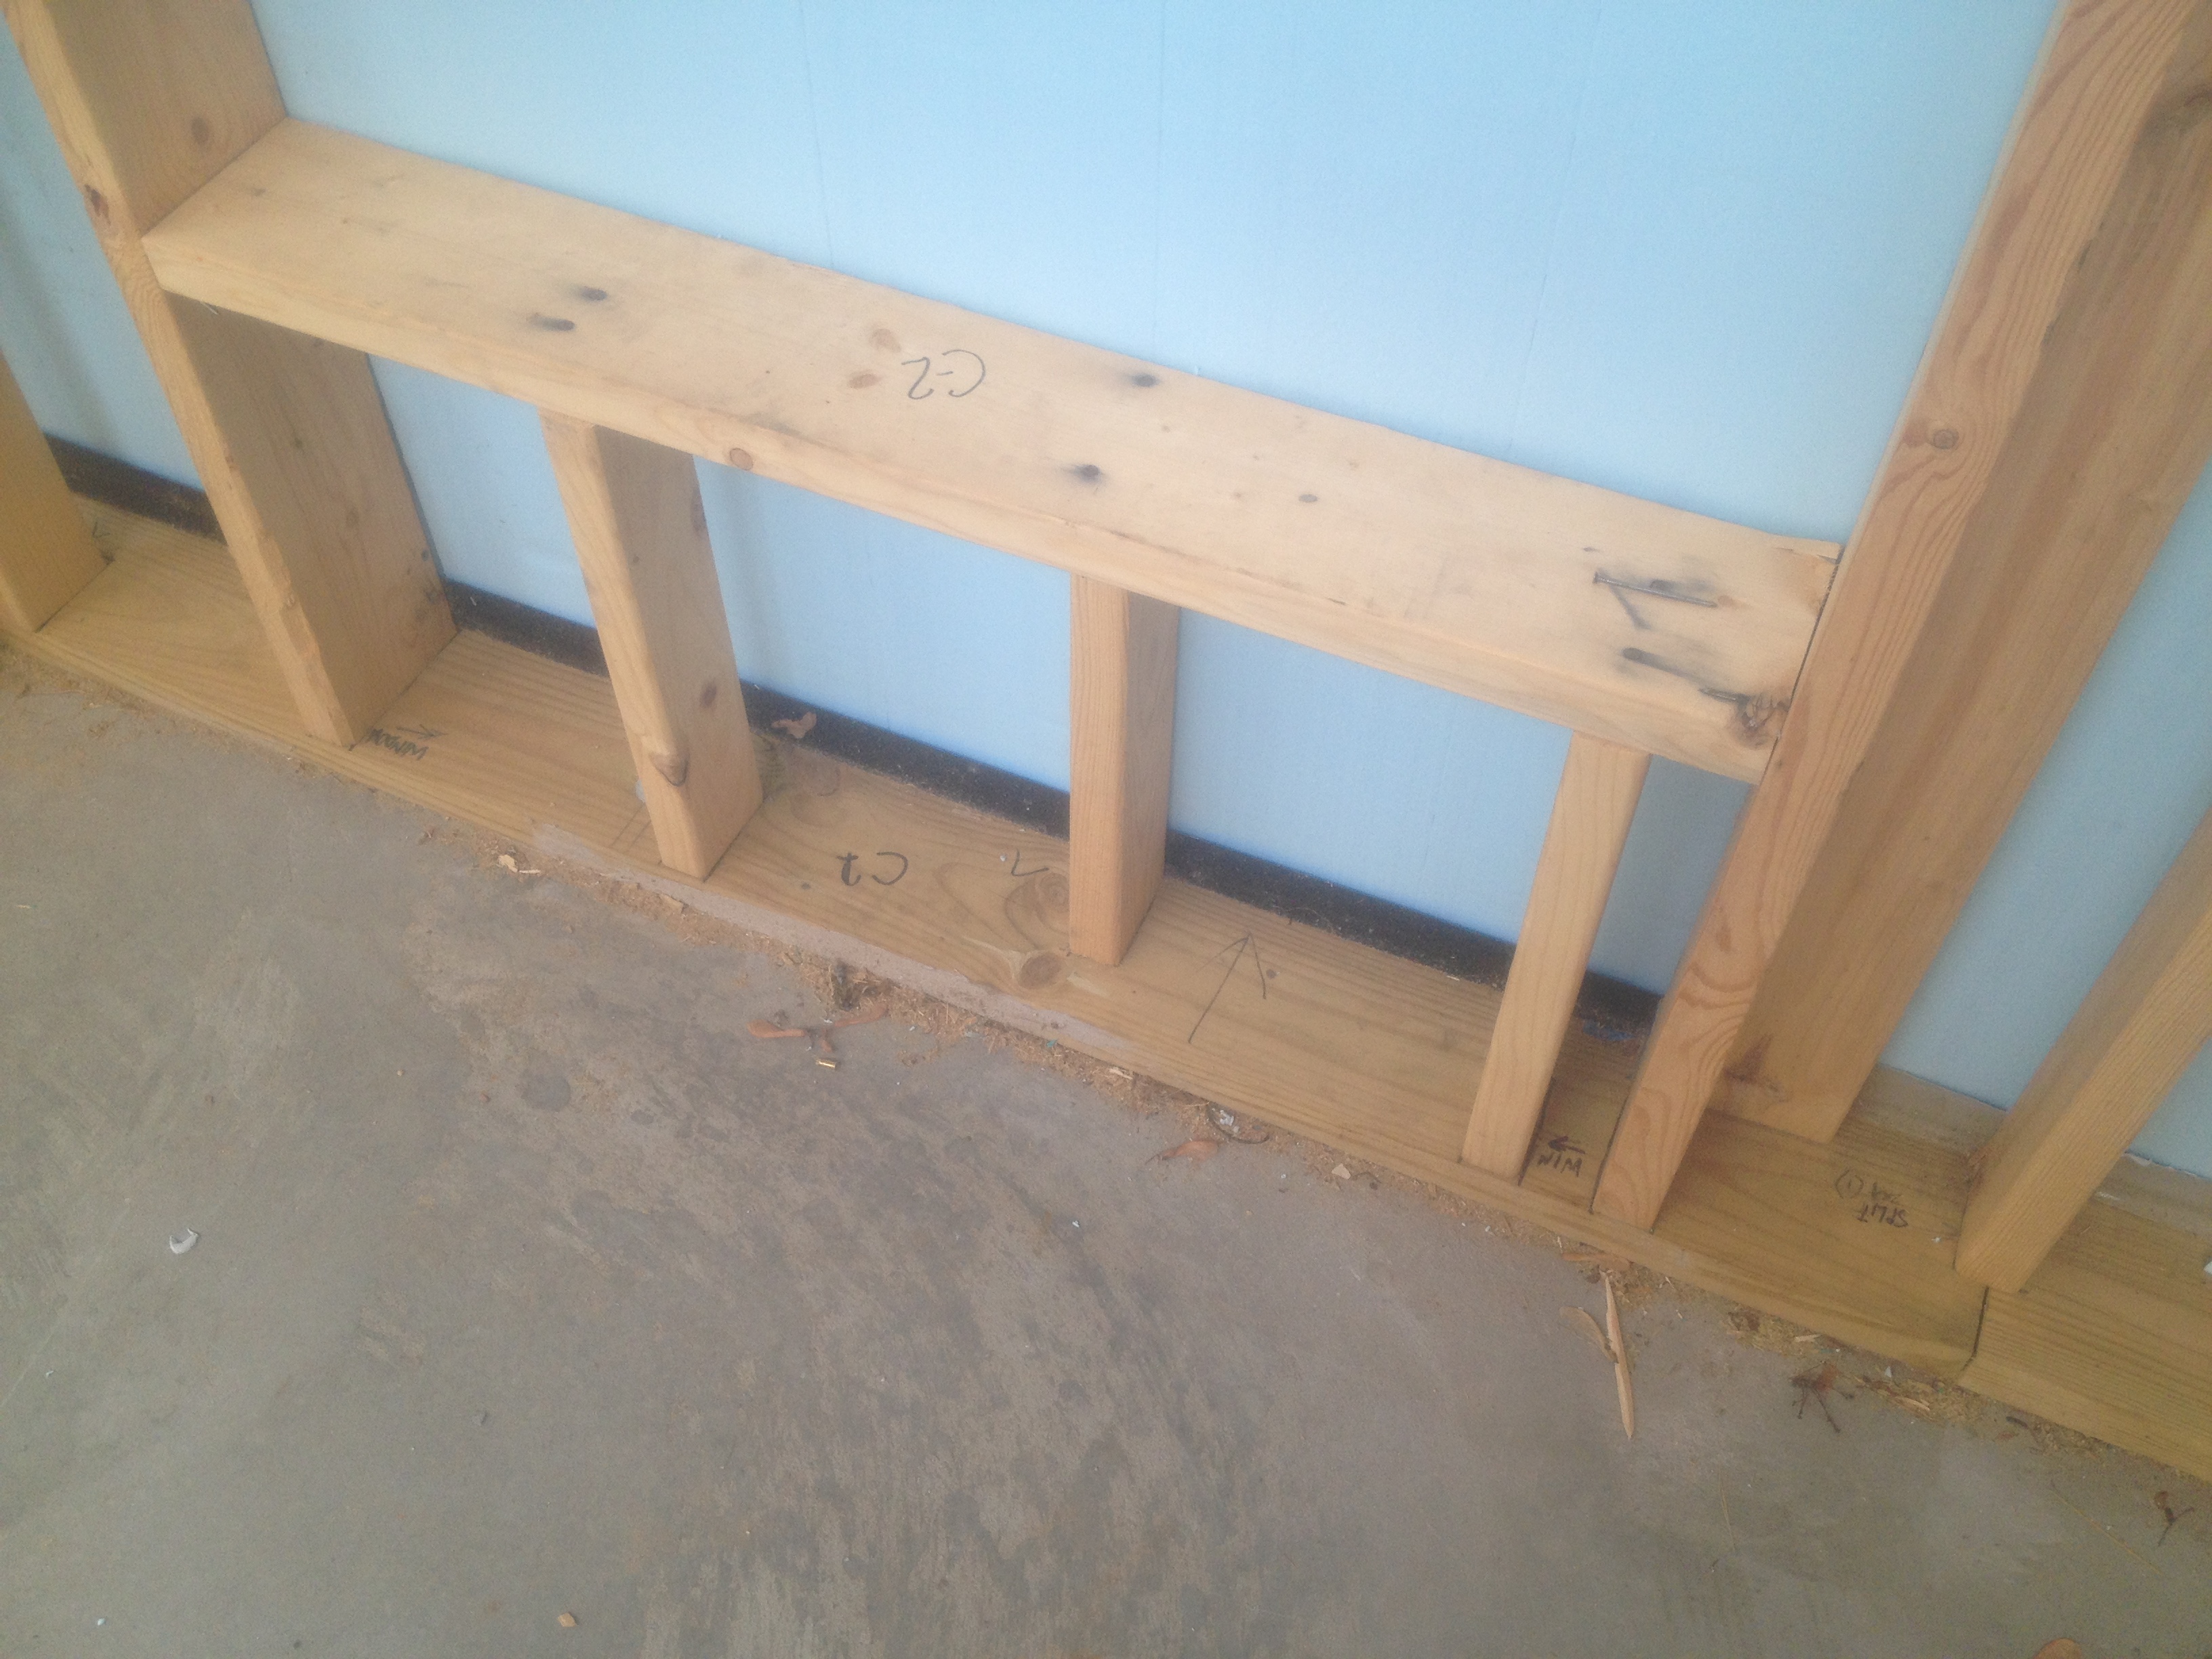
6. Single king/jack stud under load bearing headers. We combined the typical king stud and jack stud that would support each end of a window header with a single stud. We did this by notching the stud to let-in the header. You can see in the photo above how the header runs past the king/jack stud on the right hand side of the framing for the window. The lower portion of the notch is covered by blocking used for attaching siding later on.
7. No trimmer studs, or “cripple” studs, as they are sometimes called, under window sill framing. They are simply not needed.
8. Outside corners framed with heat loss in mind. We went an extra step beyond and framed open corners that can be fully insulated to stop heat loss.

9. Raised-heel, or energy-heel trusses. Much of the heat loss into an attic is at the tops of the outside walls, and this also contributes to snow melt on the roof and potential ice dams. By raising the height of the trusses where they sit on the wall, the full depth of insulation in the attic can carry all the way over the outside walls, preventing heat loss. On this project our trusses were ordered with 16 inch energy heels, which will allow for 16 inches of attic insulation over the outside walls.

10. Continuous exterior wall sheathing. Instead of applying a layer of plywood or oriented strand board (OSB) to the outside of the wall which has an R-value of R-0.5, we chose to apply a layer of 2 inch thick Dow foam, which has an R-value of R-10, or 20 times better than OSB. We used metal diagonal wind bracing to keep the walls rigid, since foam does not have the shear strength of plywood or OSB.
11. Ladder nailers for partition walls. It used to be common to build U-shaped assemblies out of 2×4’s to catch an interior wall where it intersects an exterior wall. This leaves a space where no insulation can be added, making cold spots in the wall. We used 2×4’s in a ladder pattern to nail interior walls to, allowing for full continuous insulation behind.
(Notice the extra metal bracing on the interior walls for better strength against wind shear. At this point the window openings had not been cut out of the foam.)

Once all of the walls were framed, we installed the 2 inch Dow foam sheathing to the home to enclose the walls. Heavy duty, zero-VOC (volatile organic compound) adhesive caulk made by ChemLink, a local manufacturer of eco-friendly products, was used to glue the foam to the faces of all of the studs, which gives the wall extra strength plus helps to seal the walls for less air leakage. On top of the foam sheathing we will apply a layer of Dow Weathermate house wrap, which will form a weather-resistant barrier with which we can flash our windows and doors to seal out water. With the advanced framing techniques, continuous foam sheathing, and well-sealed wall assembly, this home should perform extremely well in all seasons, maintaining a very comfortable indoor environment and saving money for the home owners.

Awesome product you are providing for your partner families! Congratulations to your staff and volunteers on this wonderful home. I would love to see progress first hand as the FPSF process was my project focus in one of my Construction Management classes. Glad to see this applied in our state as part of this Habitat Home!
LikeLike